In Part 1, we talked about the basic n8n start process and why n8n is a smart tool for automation. Now in this n8n tutorial, it is time to do something practical. The best way to understand n8n is not just by reading about it, but by creating your first simple workflow.
If you are a beginner, do not worry. You do not need to be a developer to begin. n8n is designed to make automation easier, and once you create your first workflow, everything starts to feel much more clear.
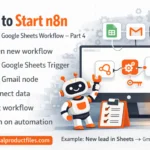
Step 1: Create a New Workflow
After logging in to n8n, open your dashboard and click on New Workflow. This is your working area where you will build automation step by step. Think of it like a digital board where you connect actions together.
Step 2: Start with a Trigger
Every workflow in n8n begins with a trigger. A trigger is the starting point. It tells the system when the workflow should run.
Some common triggers are:
- Schedule Trigger
- Webhook
- Form Trigger
- App-based Trigger
For your first n8n tutorial, the easiest option is usually the Schedule Trigger. It is simple and helps you understand the workflow process clearly.
Step 3: Add Your First Action
After the trigger, add one action node. This is what n8n will do after the workflow starts. For example, you can:
- Send an email
- Add data to Google Sheets
- Post a message to Slack
- Move information from one app to another
A good n8n start for beginners is to keep things simple. One trigger and one action is enough for practice.
Step 4: Connect the Nodes
Now connect your trigger node to your action node. This creates the path your automation will follow. In n8n, this visual connection helps beginners understand the logic very easily.
Step 5: Test Before Going Live
Before activating the workflow, always test it. This is a very important part of learning n8n. Testing helps you see if the workflow runs correctly and if the data is moving the way you want.
Step 6: Activate the Workflow
Once everything works properly, turn the workflow on. Now your automation is ready to run on its own. This is where n8n becomes truly powerful, because it starts saving your time and reducing manual work.
Final Thoughts
This n8n tutorial shows that the best way to learn is to begin small. Your first workflow does not need to be advanced. A simple setup is enough to understand how automation works. With regular practice, your n8n start will become the foundation for bigger and smarter workflows in the future.
Some of your Ready to use n8n For your business growth:
a) 1500 plus n8n Templates – Ready-to-Use